Website developing
Before we can start creating a website, we must first use a web editor. There are a many types of web editors you can use, for this I will be using Visual Studios Code.
HTML & CSS
HTML (HyperText Markup Language) describes the structure of information displayed on the website. Put it simply it is where you edit all the text and stuff you want to showcase on a page.
Simply create a new text document and change the file type to "html". Here we will name our homepage "index".
html files is not enough to create a fancy webpage, we will need CSS (Cascading Style Sheets) to help format the information displayed in index.html.
We can create one by simply changing the file type to ".css". We will call it "style".
To start editing, open the file with the web editor of your choice. To view how the page looks like, open the .html file with a web browser.
HTML Basics
Before we can start doing anything, we must specify what document type it is, hence we type " <!DOCTYPE html> " at the start so the browser will read it as a html document.
Now we can prepare the main goods. Do note "<" and ">" are used to enclose a code. We also use "/" to declare where the code stops at.
Start by declaring which parts should be written as html:
                    <!DOCTYPE html>
                    <html>


                    </html>
So everything should be written between <html> and </html>.
We can declare what kind of information you in what parts of the webpage.
Here are the parameters we will be using and what stuff we'll add in it:
We'll add some text in there too:
<p>, </p> - paragraph text<h1>, </h1> - Heading
For headings, there is a range from 'h1' to 'h6', decreasing in font size.
At the end the resulting code looks like this:
Pages and Navigation
We want to create multiple subpages in our website to organise the content displayed.
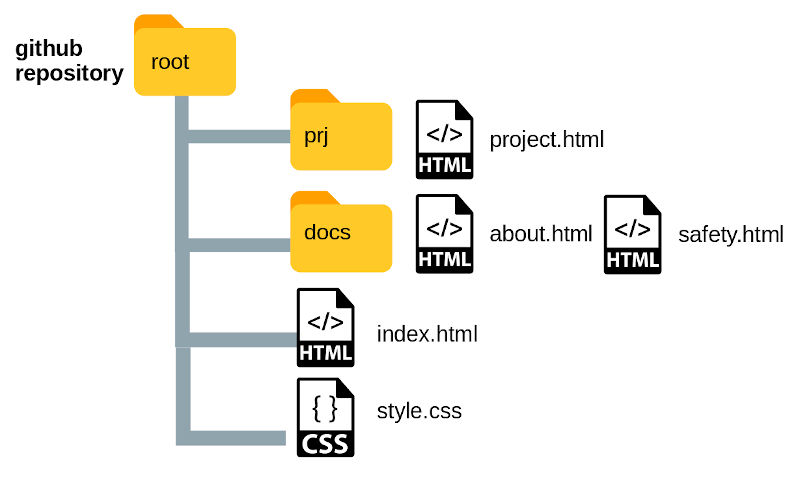
Firstly is organising the html files into its subpages. We also want to seperate the html and css files from images and documents.

Here I placed the main page and .css file in the main folder. Then I create docs file for the Topics page and prj for the Project page. Lastly all images goes into the img file.
Here is a diagram to what the root looks like:
To link the main page to the other subpages we will use <nav>.
 <nav>
                        <ul class="navlink">
                            <li><a href="index.html" >|Home|</a></li>
                            <li><a href="docs/topics.html" >|Topics|</a></li>
                            <li><a href="prj/project.html" >|Projects|</a></li>
                          </ul>
                    </nav>
We need to specify where the html document is located. if the document is in the same folder we can just state the document name.
However if it is in a subfolder, we must first type the folder name, then the document name:
docs/topics.html
This tells us "topics.html" is located in the folder name "docs".
But now we want to link "topics.html" back to index. To go back we use '..':
Hence in "topics.html" our <nav> will look like this:
<nav>
                      <ul class="navlink">
                          <li><a href="../index.html" >|Home|</a></li>
                          <li><a href="topics.html" >|Topics|</a></li>
                          <li><a href="../prj/project.html" >|Projects|</a></li>
                        </ul>
                  </nav>
From here we are mostly done with learning how to add content to our website.
Useful links to know more about html and other functions:
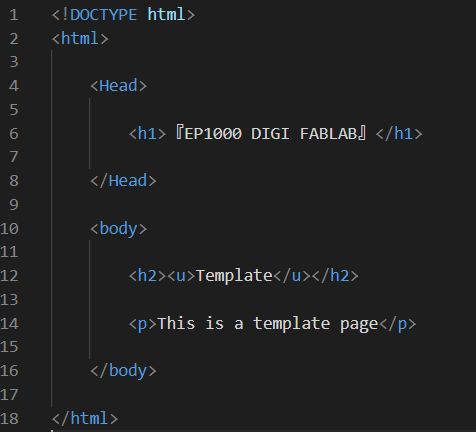
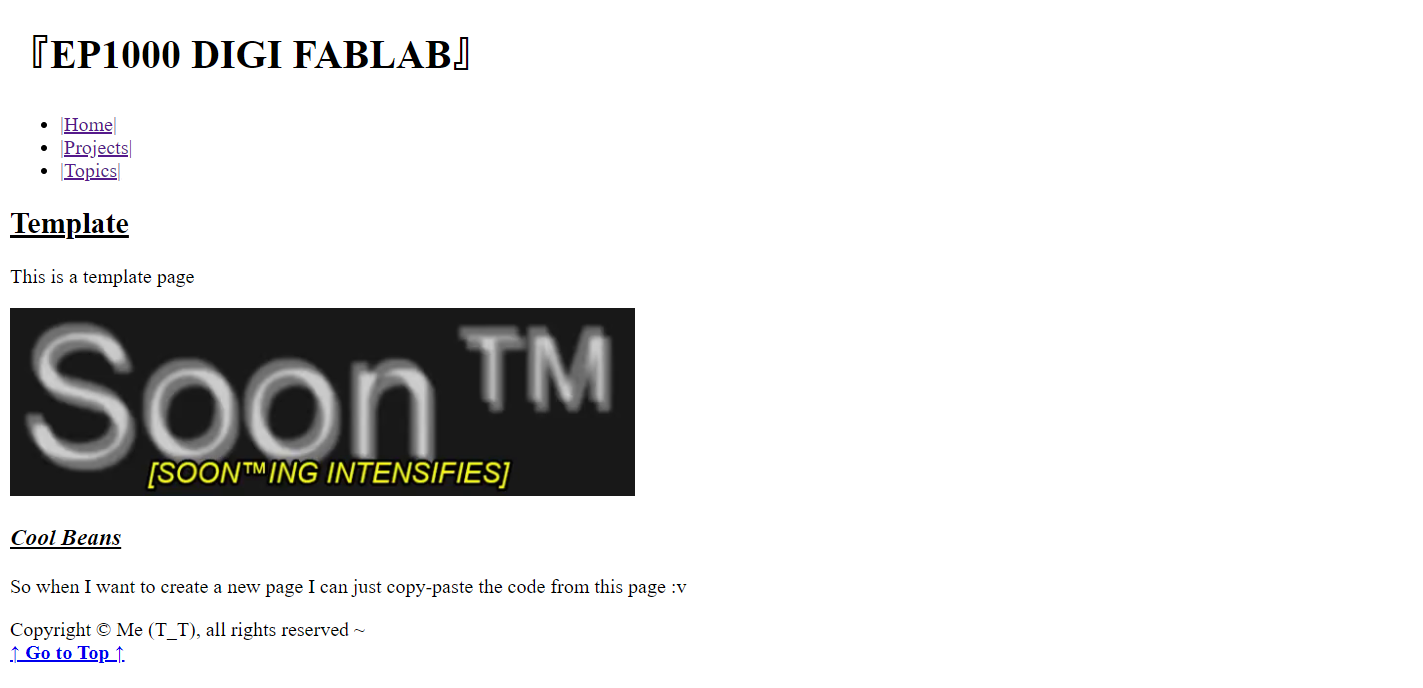
Hence a code like this:
<!DOCTYPE html>
<html>
<Head>
<title> Topics</title>
<div id="header">
<h1>『EP1000 DIGI FABLAB』</h1>
<nav>
<ul class="navlink">
<li><a href="../index.html" >|Home|</a></li>
<li><a href="../prj/project.html">|Projects|</a></li>
<li><a href="topics.html" >|Topics|</a></li>
</ul>
</nav>
</div>
</Head>
<body>
<div id="container">
<div id="main">
<h2><u>Template</u></h2>
<p>This is a template page</p>
<img width=500px height=auto src="../img/soon.png" >
</div>
<div id="contents">
<h3 id="-ins-cool-beans-ins-"><ins><em>Cool Beans</em></ins></h3>
<p>So when I want to create a new page I can just copy-paste the code from this page :v</p>
</div>
<div id="footer">
Copyright © Me (T_T), all rights reserved ~
</div>
</div>
<a class="top" href="#header" title=""><b>↑ Go to Top ↑</b></a>
</body>
</html>
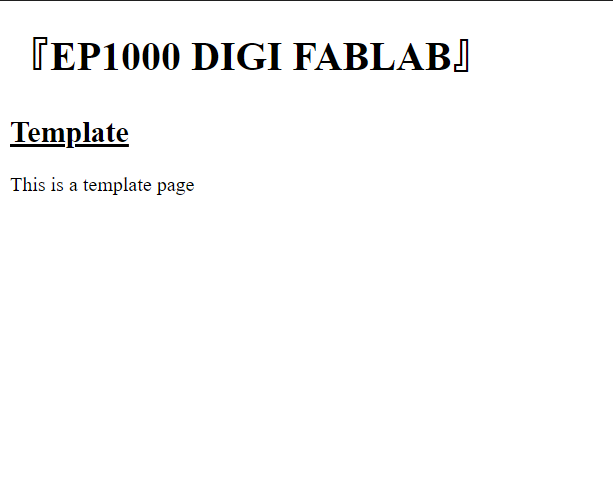
Will look like this:
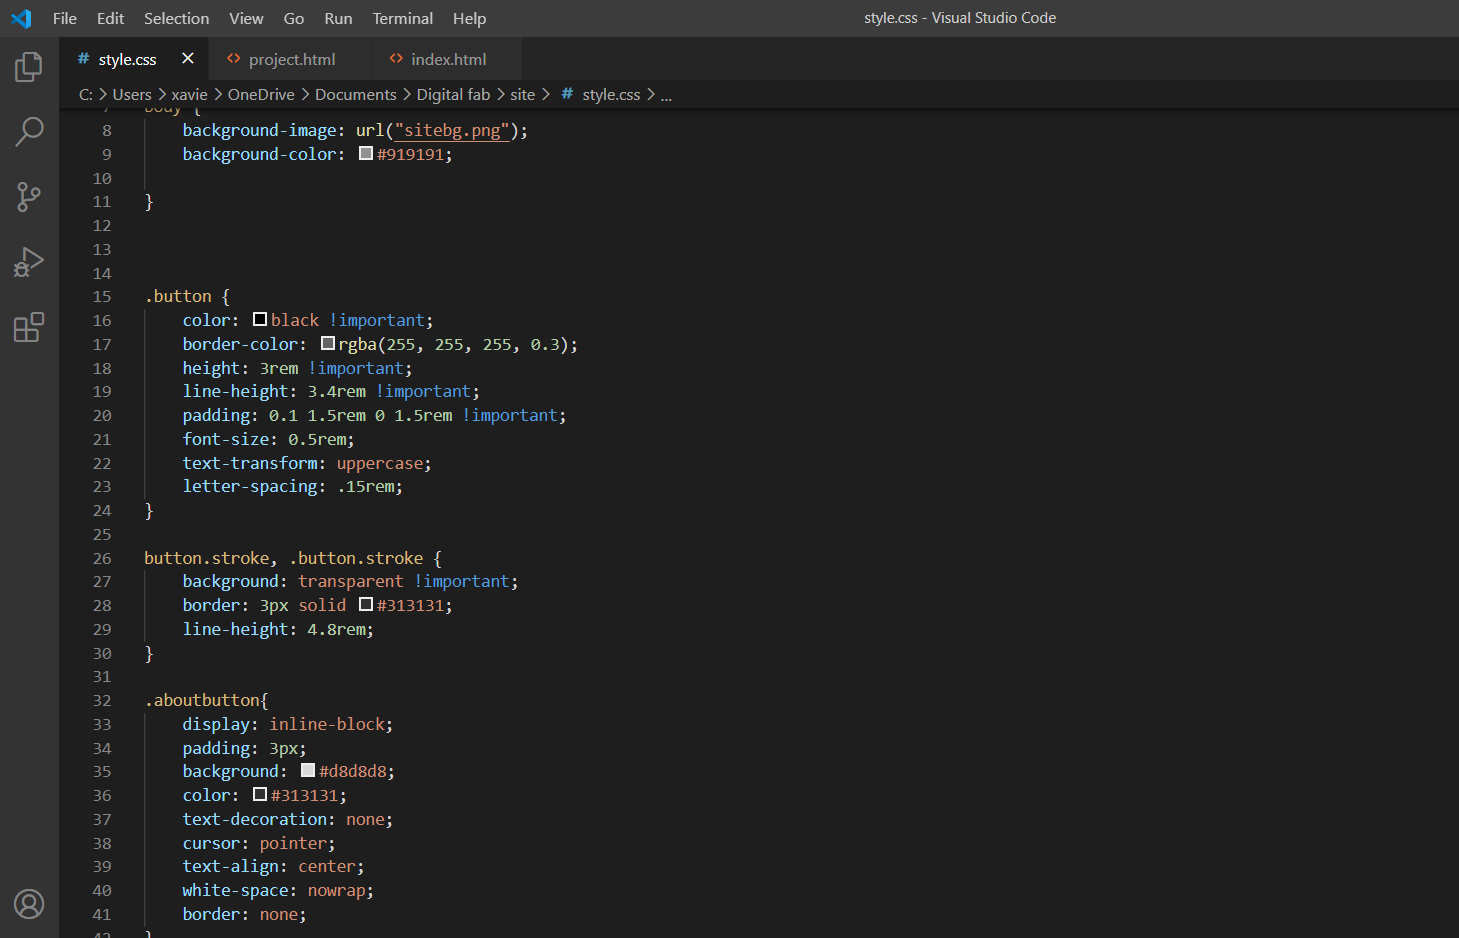
Fancy CSS
CSS is the MSG for your website....~
There are multiple ways to use CSS in your HTML documents
- Adding them in HTML elements with
style attributes
- Using
<style> element in html sections
- Creating an external CSS document and linking it to the HTML document.
Here we will be using option 3. Not only it is more organised but you can use the same document for multiple pages, all for the consistency. For this we will link the .css document by adding <link rel="stylesheet" type="text/css" href="../style.css" /> into the top of the html document.
Here is the CSS code for the about page:
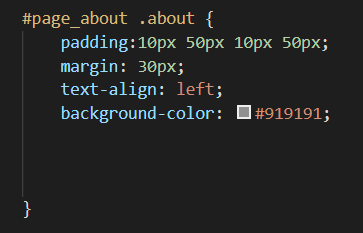
A CSS rule-set consits of selectors and a declaration block
In this case, #page_about .about is the selector where:
#page_about is the ID. You select this element with id=page_about.about is the class. You select this with class="about"
You can combine selectors to make things more specific:
#page_about .about : Only information in #page_about with the class "about" will be affected.
If multiple elements share the same style, you can add them in a single syntax:
.about, .main : Information in class "about" and "main" will share the same properties.
There is alot of things CSS can do, and its hard to list down everything here,but all the basics can be found in Wsschools .
And so after hours of experimenting with CSS, I ended up with the page design you see before you. During those trial and errors there will surely be that one moment your entire page breaks and you don't know why so you end up doing a rollback on your code.
Up next is how I manage this with Version controlling (with github).
Version Control
Back when I play Minecraft creative (I still do) I had the fear of losing my 4 years of building from file corruption or I mess something up, so now when I finish a huge project I would copy the file and save it in a hard drive in the events I needed to rollback.
It indeed took alot of space.
Version control is basically the management of changes to documents and collections of information. In practice a change of such document is done by labelling with a number to indicate its version (i.e date of save, V1, V1a, etc.)
It also allows multiple developers to work on a project, allow one to experiment on new things without interfering with the current project and also allow one to review and see changes in multiple versions of the project.
Version Control with Git.
First install Git from its website.
Once you download Git, you can either use Git Bash or the command prompt to set up.
First is to set your username and email address:
$ git config --global user.name "My username"
$ git config --global user.emal "Me@gmail.com"
Next is to initialize a repository.
Create and locate the project folder:
For windows: $ cd C:/Users/user/my_project
Then type $ git init .
You can check the file status with $ git status.
To add files use $ git add <file>.
Alternatively, use $ git rm <file> to remove files. Adding files will bring it to the staging area.
After that you can commit the file with $ git commit -m "[descriptive message]" and it will be recorded. The descriptive message describes the changes made to the file and will come in handy when you want to recall previous versions of the file.
And finally you can publish the commits with $ git push. To view logs simply type $ git log.
This diagram illustrates how it works:
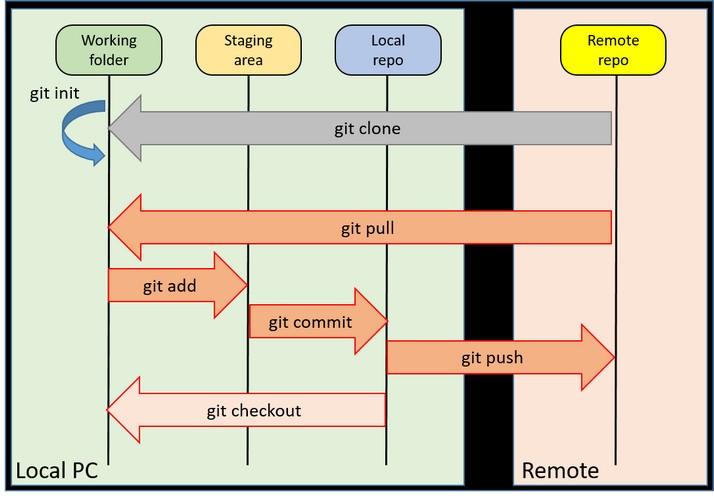
You can clone a repository with $ git clone [Link] . This will download it to your local machine.
Whats stated here are just the basics of Git. You can learn more from the links below:
Github
Github has a desktop app that lets you version control with a click in a button. I honestly prefer using this.
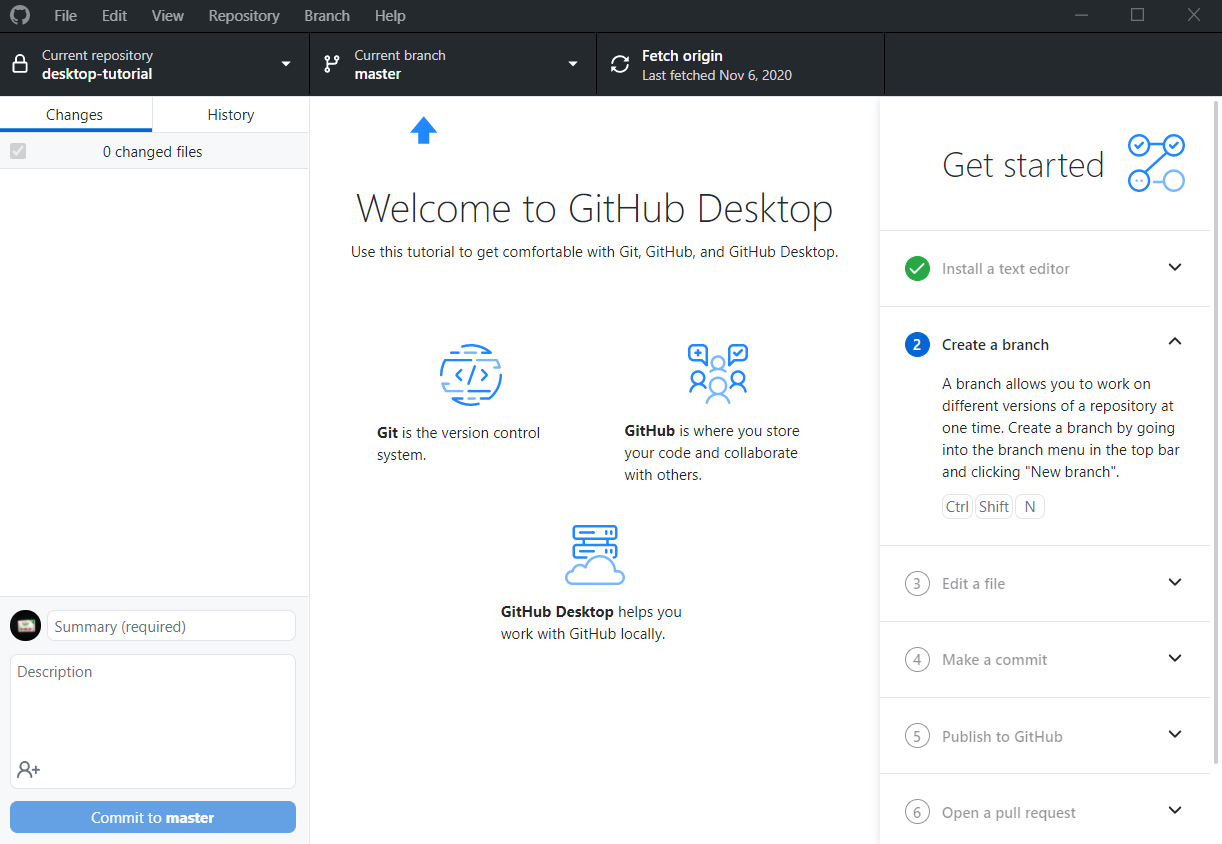
Creating a repository in Github Desktop
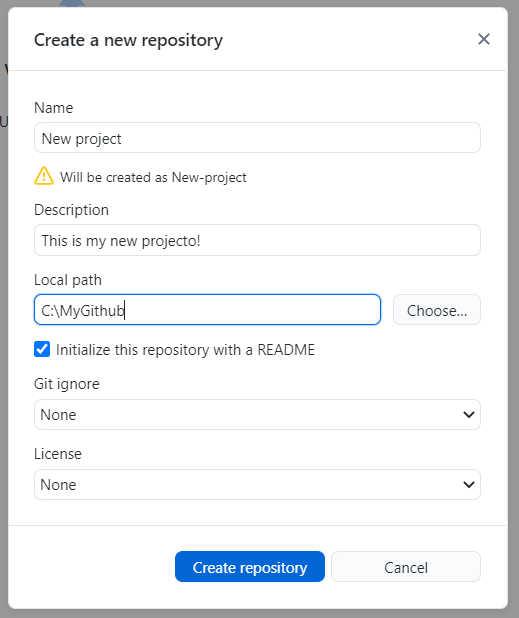
In Github Desktop, go to File > New Repository.
You can choose the repository name, description, and folder location.
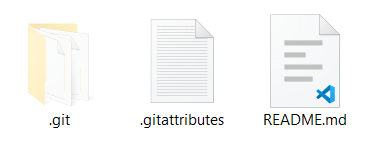
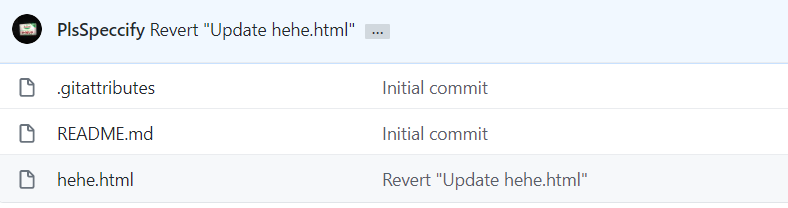
Opening the repository in your desktop will include this files (README.md will be there if you Initialise with a README).
Once you configured your username, email and initialized a repository, you can move your documents into the file.
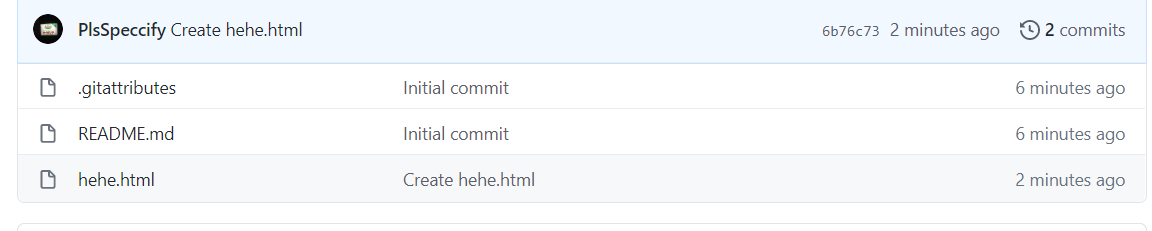
Here I added "hehe.html" into the repository. In Github Desktop it should appear under Changes.
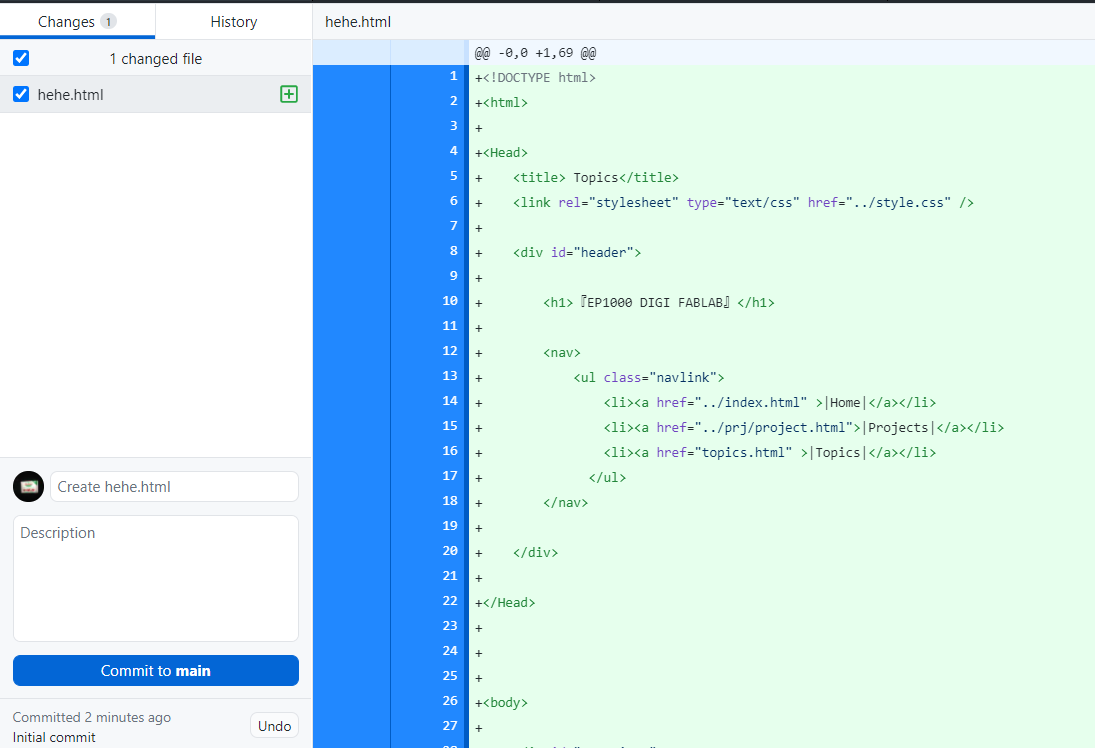
To commit, simply write in the description the changes and click "Commit to main".
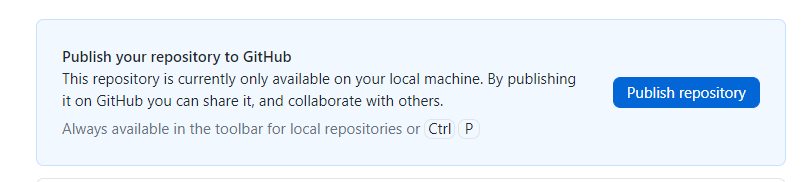
Check “Keep this code private”, if you want your code to be private. You can always change privacy in the repository settings.
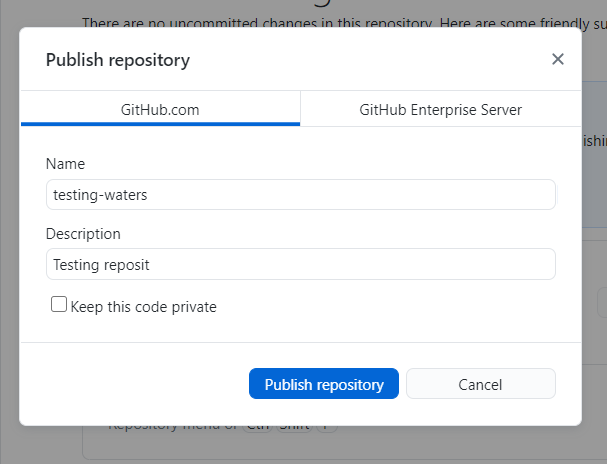
Then you can Publish the repository. It should appear in the Github website.
So now when you edit a document, the changes will be shown in Github Desktop. From there you can commit and publish.
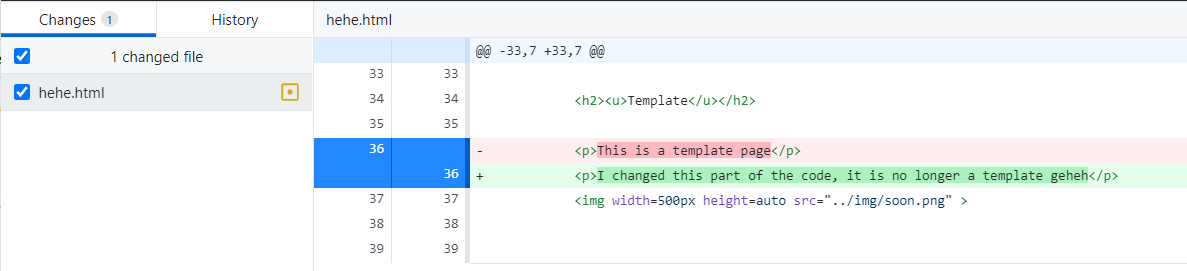
If you did an oopsie, you can go to the history tab, right click and revert the commit.

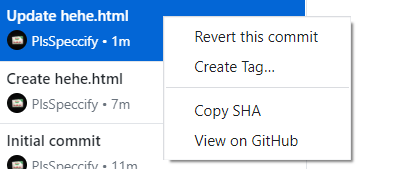
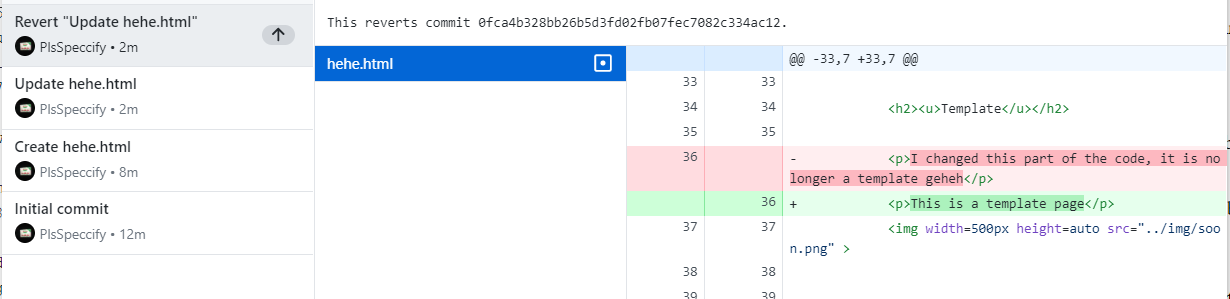
Then click publish to revert the change.
Hotsing website with GitHub
So once you are confident with your work you can bring it online for everyone to see.
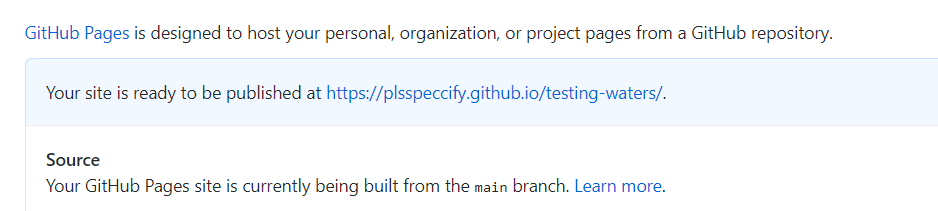
In Githhub website, in your repository go into settings and locate "GitHub Pages".

Change the Master Branch and save. A link will appear.
Annddd... You're done! I guess....
You can edit your pages on your local machine, and when you are satisfied, commit and publish for it to appear in your website! Note it will take a while for the page to update.